|
Drawing the mouth, lips, and teeth
|
Drawing the mouth, lips and teeth can be as simple as drawing
|
 |
The keys to drawing a likeness of the mouth and lips are the same as drawing anything else: know the basics of drawing and know a little bit about what you're trying to draw. |
|
If you're coming from the Drawing Noses page this'll work great because there's a wonderful piece of anatomy that segues us right down to the mouth and lips: it's called the nasal philtrum. And it splits the lip into halves (it's also an "embryonic marker" of where the two halves of your body glued themselves together when you were just forming in your mother's womb. It's a miracle how perfectly the body's halves come together.) |
|
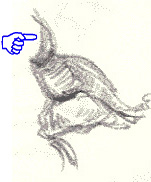
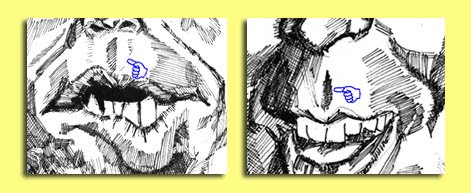
Pointing out the "nasal philtrum"
Here's a picture pointing out the naso-labial folds. Can you see how they "hem in" the apron of the upper lip? Check it out in the picture on the left in this little text box below: |
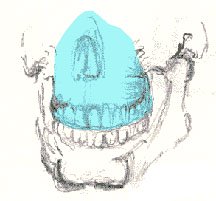
But we began this conversation talking about the apron of the upper lip - which is really the slope, the sheet of skin between the nose and upper lip and it drapes the underlying bones, the gums, and the tissue that support the upper row of teeth as well as the upper teeth themselves (this bone is called the maxilla to be exact).
Ever changing anatomy So as you travel your way over this expanse (the apron of the upper lip) you see a change of the type of tissue as you transition onto the actual lips. This border - the "vermilion border" aptly named since the lips have a vermilion, satin texture to them - marks the the change from apron of the lip to actual lip. (At a cellular level, the actual cell types change.)
The lips Lips can be one of the toughest parts of the face to draw. Why? Because they change so dang much! Watch when someone talks, laughs, thinks - and observe the maelstrom of changes that take place there as every little change in emotion and attention of the owner is reflected right there.
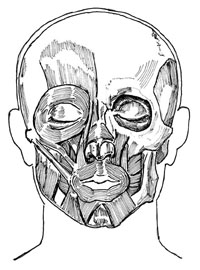
Who or what controls the lips? So what accounts for all those wild shapes and gyrations the lips go through? It's the muscles intrinsic to the lips (like the orbicularis oris) that allows you to purse your lips and it's the extrinsic muscles of facial expression that pull on them like the hands that pull on the game piece of Ouija board. Except that the game piece in this case - the lips - can be pulled and stretched in all sorts of different directions at the same time.
The majority of the muscles of facial expression (You can see all those muscles and how
What more to the lips ? What else makes up the lips? OK you have two lips. You've got upper and you've got lower lips. The upper lip is made up of three parts: a middle section that's home to that little "v"-shaped dip right in the middle (right where the philtrum ends). This dip in the center of the upper lip is also called "Cupid's Bow". The other two parts are the left and right "wings" of the upper lip. You can check out both in these next two pictures:
|

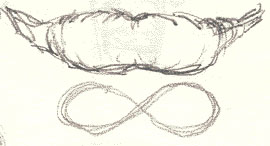
| The lower lip The lower lip in general is pulpier and sometimes has a figure 8 look to it. Sometimes the vermilion border curves right through the middle of that figure of eight shape. Be on the look out for that.
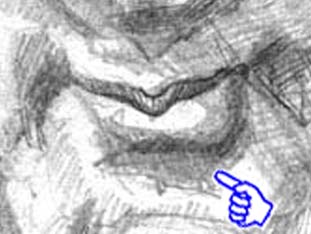
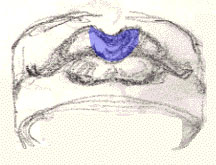
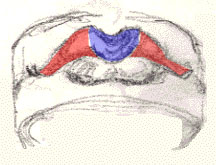
As you rotate the lip to a side view you can see the line that demarcates upper from lower lip as well as the nasal philtrum. (Remember, skill number one is looking for lines and edges that separate distinct shapes and elements of any composition). Jump on down to the next picture, squint and trace right on your screen, the shape of this wedge (the picture has the blue pointer finger pointing out the philtrum). You can also see the line that demarcates the "vermilion" of the lip from the chin. (What do you call this line again? Right! - the vermilion border :-).
The side view: In this side view you
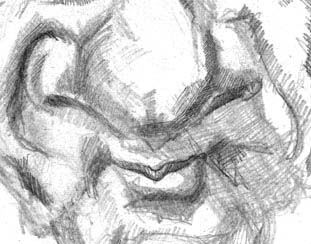
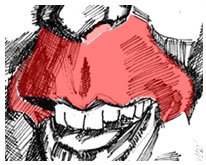
The shadows of the mouth and lips Let's revisit the above picture and see if we can't uncover some shadow patterns around the mouth and lips. In normal light (if there's any such thing), the light is generally coming from above. So the strongest shadows are cast downward. Of course, if the light is coming a bit from the side, it'll influence the direction of the shadow as well. That being said, the main shadows are on 1) the underside of the upper lip, (the upper lip is almost always dark), 2) the naso-labial folds - especially as you approach the actual margin of the fold (i.e. as you get closer and closer to the cheeks) and 3) at the corners of the mouth. There are several other shadows too (and you can see them listed in great detail and explanation in Lesson 15 of the YouCanDraw.com e-book).
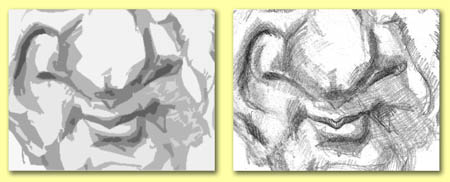
Revisiting two old tricks No need to memorize them - all the different shadow areas that is. Steady observation will reveal them everytime. In fact, you have two tricks up your sleeve at all times whenever you're confronted with what appears to be an overly complicated picture. These tricks allow you to shrink "way too much detail" into manageable, drawable shapes. And what are these two tricks? You've seen them before in other lessons at this info site. They're these two: closing one eye and squinting. Closing one eye is great for collapsing live, 3-d models into 2-dimensional shapes you can easily draw. Squinting shrinks all that detail and variation of tone, shades, and highlights down to drawable entities. Like this:
The picture on the left is the simplified version of the picture on the right. How's it simplified? All
Take a closer look at the "4 shades of gray plus white" picture. Yes there's
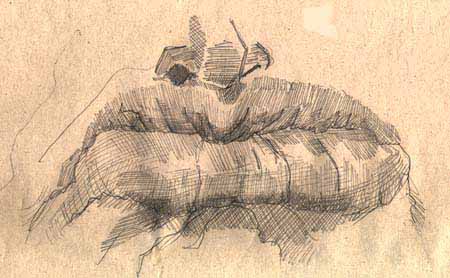
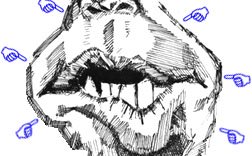
Another thing to remember is this: the lips are basically rounded. In fact the lower lip is almost tubular in shape. And so it's intrinsic shadows and highlights (the highlights and shadows on the lips themselves) follow the same patterning as they would on a tube or cylinder. Check out the lower lip in this picture to see what I mean - (it's like tubular dude:-):
And lastly, there's the lines within the lips. These are like the elastic folds you see in those hair binders people use to hold their hair in a pony tail (at least that's the first example that comes to my mind). They can look like this:
A close-up study of the vertical lines within the list: this is caused by the accordion-like elasticity of the lips. That is, the lips have a very pliable rubber-like stretch and shrink property to them. They want to shrink as far as the other musculature of facial expression will allow them. That was mouthful!
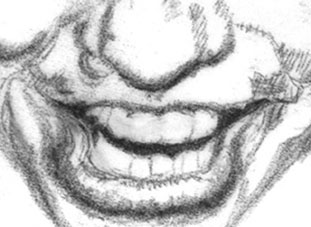
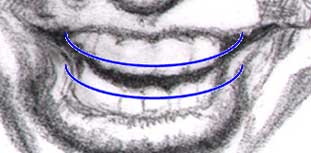
The teeth Lastly, when drawing the mouth, you got teeth to contend with too. And they're pretty simple. You don't have to worry about a whole mouthful of teeth when you draw. In fact most the time all you have to worry about is just a few teeth of the upper jaw and 2-6 in the lower jaw (an adult has 32 teeth).
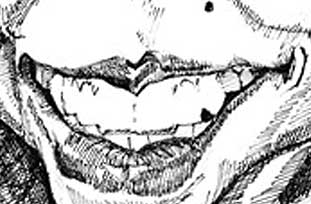
The main shape of each tooth ranges from rectangular (like you see in the "two front teeth") to the cuboid shape of the molars - which you rarely see in most people's smiles. The other noteworthy thing to mention is this: the teeth are strung linearly (i.e. in a row) along a curved foundation. This curve - or ellipse - reflects the curved shape of the bones the teeth originate from (i.e., from the maxilla above and from the in mandible below.)
To represent the gums you can draw little "v" shapes right at the edge where two teeth are side by side. These "v"s are right at the bottom ends of an upside down "U" shape that cross each actual tooth. Like these:
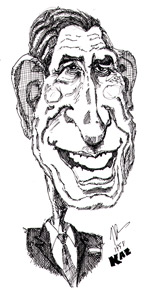
Sometimes you can get away with just drawing an outline of the overall tooth shapes without drawing the lines that separate each separate tooth like in this picture of Prince Charles (note the implied ellipse shape hid in these teeth - especially in the upper row):
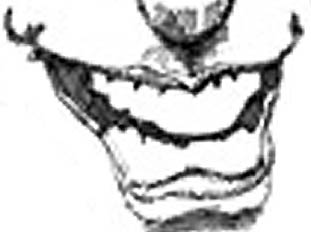
And here's a close up of those same royal teeth. Note also in this next picture the shape of the shadows around the teeth. Recognizing these shapes, actually "negative shapes" will help you draw the teeth (and we discussed positive forms and negative shapes on this page - if you go to this page, scroll down to the yellow box near the top and click on "The Second Skill" to see more about "positive forms and negative spaces"). Here's that close-up of those royal teeth
View the blackened area around the teeth as a separate shape -
One more set of celebrity choppers
OK. You've gone through all sorts of detail again to understand some rather advanced ideas and concepts about the teeth. But they really aren't that complicated since drawing them can all be reduced to the five skills of drawing. The great art teacher Robert Beverly Hale said you'll draw with a whole lot more depth if you see beyond what meets the eyes, that is if you really understand what's there and why it's there. And I'm trying to give you an inkling of what that might mean in these pages.
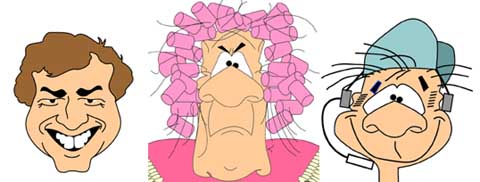
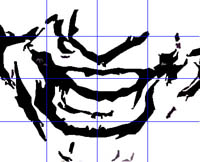
How would a cartoonist draw the mouth, lips and teeth? Want to see how a cartoonist might handle all this detail? Let's look at a couple cartoons - and after that, it's your turn to draw! :-) In this first trio of cartoons, you can see the lips and teeth have been handled with a minimum of detail. In fact, other than for the teeth in the cartoon face on the left, the mouth shapes have been handled entirely with one or two lines. And the amazing thing? We can still interpret the picture:
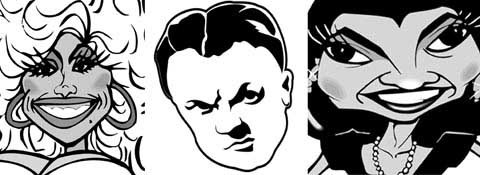
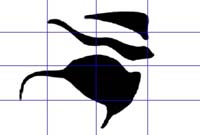
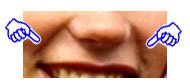
Note how with just a few lines cartoons accomplish recognizable features - in this case focus your attention on the mouth and lips. In this next trio of pictures, we step up one level of detail. The lips are actually outlined on the two women. And really look close at the example in the center: the man. Why? Note how the lower lip isn't even drawn: it's inferred by the outline of the upper lip and the shadow shape beneath it. Pretty neat, don't you think?
Compare this trio of cartoon pictures with the trio above - note how the lips are treated in both.
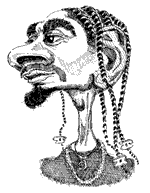
Here's that middle picture blown up a little bit. Look at the rest of the features too - namely the eyes and nose. Look how a feeling of depth, that three-D feel can be accomplished by drawing just shadows:
Note how much information can be expressed with
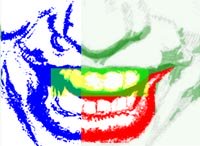
Now compare this cartoonish "shadow-only" face with this next double picture (you saw this picture above):
Compare this more complicated picture with the picture just above and try to realize that the
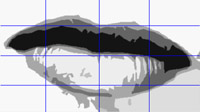
One last thing: time to draw! OK. Guess what time it is? Yep, it's time to draw! And ya know what? You can do it, I have no doubt. We're going to use gridded samples like you've seen at all the other pages. So go for it. Click on the button just below the picture - it's linked to a printable gridded practice sample.
Your Drawing assignment #1 - Click on the Click here to see these lips with a grid:
Here's a slightly more complicated version of mouth, lips, teeth, etc. You get to do the same with this: draw a duplicate in the empty grid. Go for it! :-)
Click here to see this second set of mouth and lips (with an empty grid of course):
Then do this one - but let's do it with a twist. Print out the page first and draw it exactly as you see it - with the "top" at the top of your paper. When you're done, flip it over. You'll be surprised. Can you figure out which picture on this page it belongs to?
Click here to see these lips with a grid:
Wrapping it up OK! You've done a great job working your way through all this information, did you try the drawing exercises? Go back to the Drawing Basics and Drawing Basics II page for more lessons on the foundations of drawing - everything on this page builds upon that. Like to learn more about drawing the other parts of the face? Check out these links: Drawing the eyes Watch here for a whole bunch more great drawing information links too :-)
|