|
Maintain perfect proportion enlarging any picture or drawing using this simple technique.
Caricature and Drawing Newsletter for June, July 2007
This newsletter is reproduced here courtesy of YouCanDraw.com -
Once and for all getting you drawing faces and caricatures:
June / July 2007
Back to the www.YouCanDraw.com Archives
|||||||||||||||||||||||||||||||||||||||||||||||||||||||||||||||||||||||||||||||||||||||||||||||||||||||||||||||||||||||||||||||||||||||||||||||||||||||||||||||||||||||||||||||||||||||
Your June / July 2007 YouCanDraw.com Communiqué
|||||||||||||||||||||||||||||||||||||||||||||||||||||||||||||||||||||||||||||||||||||||||||||||||||||||||||||||||||||||||||||||||||||||||||||||||||||||||||||||||||||||||||||||||||||||
Howdy all,
two things today 1) you're going to learn a technique for enlarging even the smallest picture - you'll blow it up with only a pencil and a ruler (or a yardstick), to ANY size you want, like to the size of the Brooklyn Bridge if you like :-).
2) Secondly, and after a lot of soul searching - and after a decade of doing this - I'll be reducing the ezine to every 2 or three months, or quite possibly discontinuing it altogether. The call will be mine. This could start as soon as next month (but it might take 2 or 3 months to finish the detailed ezine I'm beginning today). But definitely after that. *(This is all reflected on the sales page as well.)
I've thought about a blog - which would be fun if I do it about more than just drawing. I've thought about little tiny emailed nudges each month in place of a large production or maybe just caricatures without the long winded explanations. I guess I've gotten just a little burned out / run out of things to talk about after a decade. I'll have to see what feels right. If you have any ideas please let me know!
AND I know if you just signed up you might be disappointed or feel caught a little off guard. So to make amends, anyone who's signed up within the past 12 months will have access to the online site FOREVER. Hopefully that is some compensation. But hear me: we're not disappearing: just becoming a little less visible. I've wanted to update many of the pages within the e-book but with only so much time in the day I've never got around to it. This could be the time for that. I've gotten awesome suggestions from all of you and now I'll have the time to perhaps act on those suggestions.
OK! Enough of that. On with it. Today's lesson...
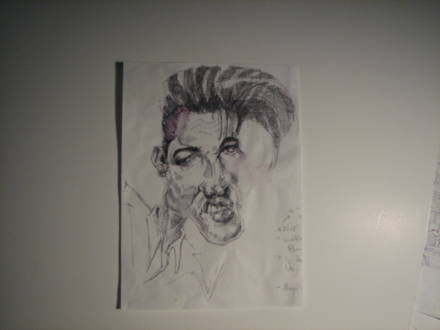
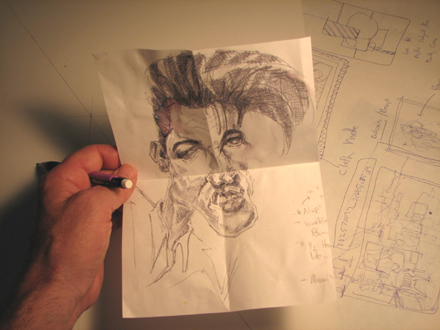
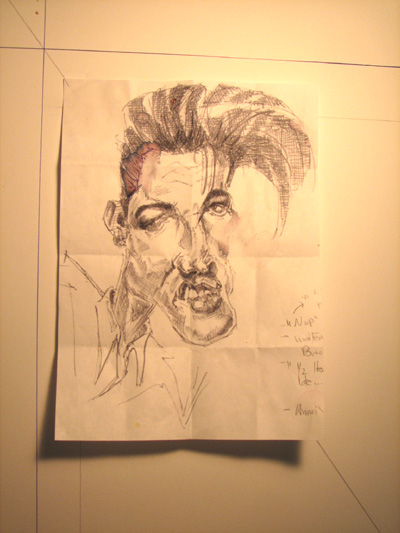
Here's a printed off picture of an Elvis caricature. I trimmed the 8 and 1/2" x 11" paper to maybe 6" x 8". Here it is:
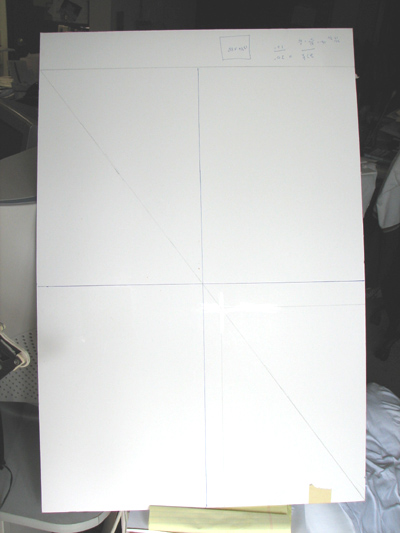
(Check out this link to see the same jpg I'm working from). In the next photo you can see the Borden's foam board (from the same makers of Elmer's Glue ) It's 24" x 30" in size (it's the big white sheet the little Elvis is sitting on:
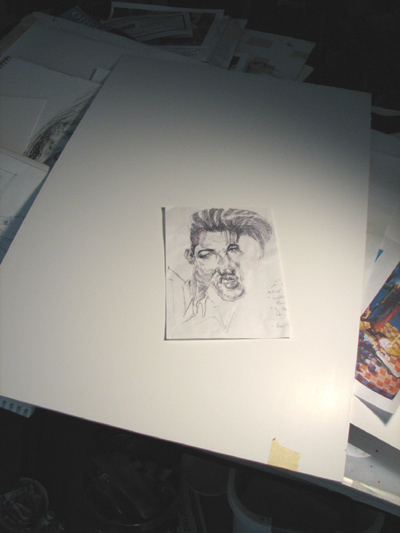
The game plan? We're going to proportionately enlarge the "format" (i.e. the shape of the paper elvis is drawn on). Yep, we're going to blow it up to fill this board.
Step one: place the picture as squarely as possible into one corner of the board (or paper or whatever you're going to draw it on; I'll be using board so I'll keep referring to my paper as "board"). Maybe even put a little piece of tape to hold it in place.
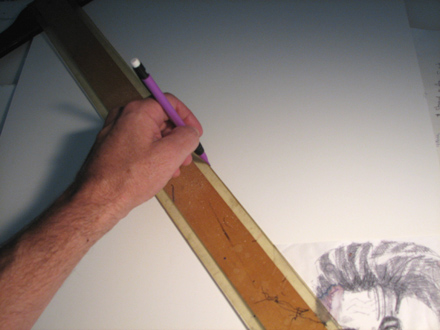
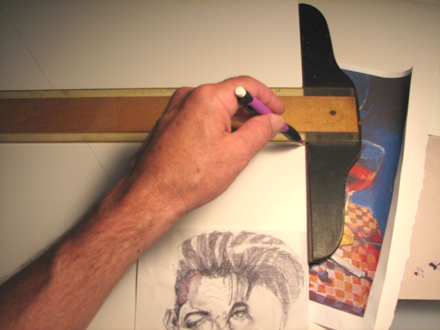
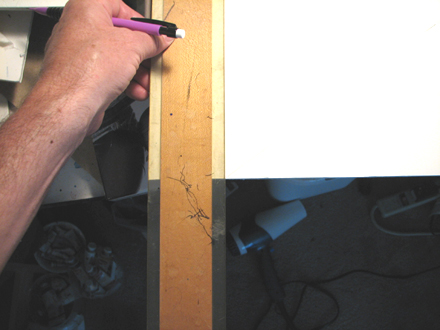
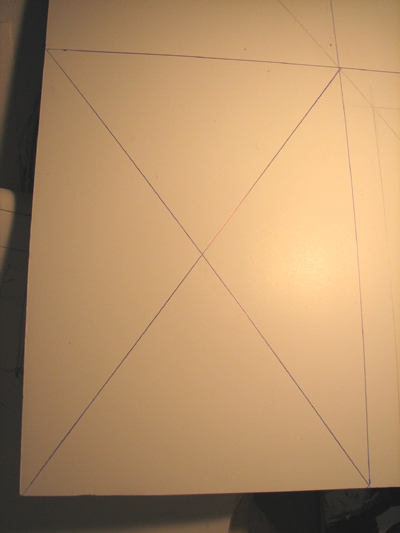
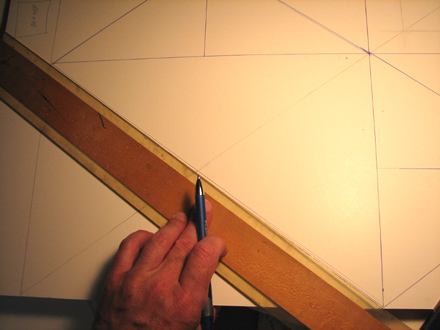
Next: grab a ruler, a yard stick, a t-square, about anything you can ruler out a straight line with and align it from one corner of the picture you're enlarging to the other diagonally opposite it like you see here:
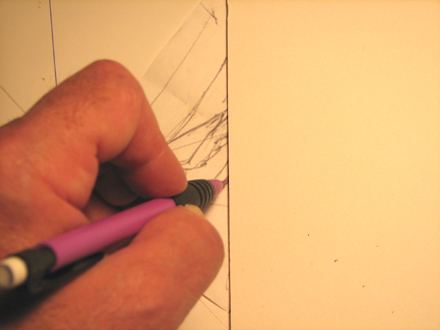
That ruler is resting directly over both those corners. Now draw a line as straight as you can for as far up that board as you like (doesn't matter how big)...just don't draw on to the walls if you don't have permission.:
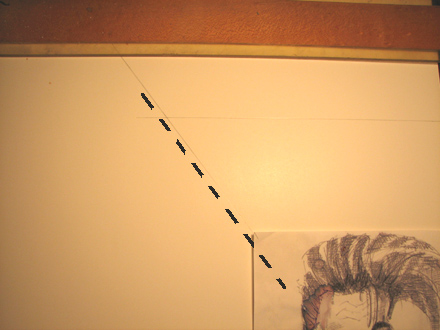
On the particular piece of board I'm drawing on, you can see in the photo below the line goes off the board before I get to the corner. Does that mean I did something wrong? Heck no, just means if you're accurate about drawing corner to corner on your smaller sized paper, that the bigger board is a slightly different shaped rectangle than is the smaller paper we're aligning the ruler on. Make sense?
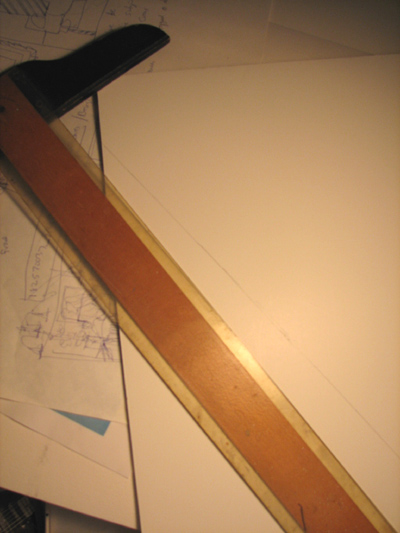
Ok, look at the next pic below. You can see the pencil line is right at the corner (well very close :-).
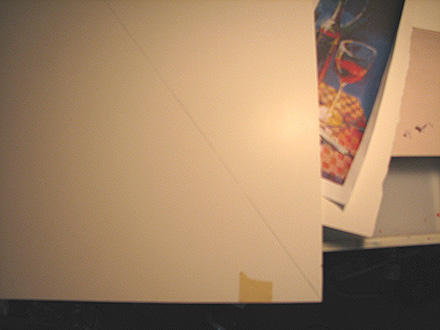
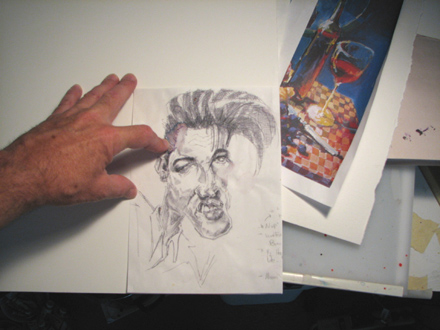
If we place the smaller drawing paper back on the board, you can see how well the line aligns with the original diagonal of the Elvis paper:
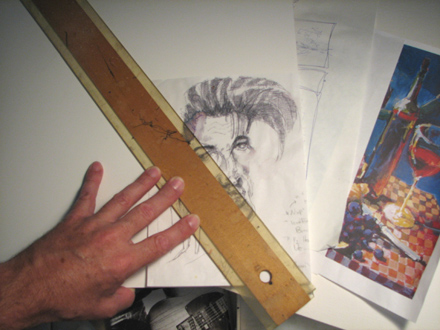
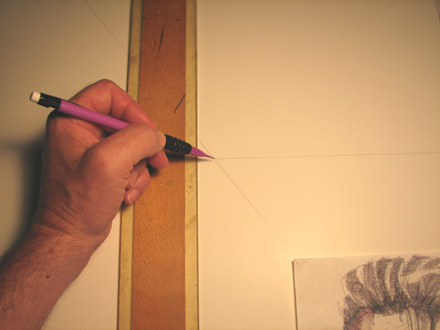
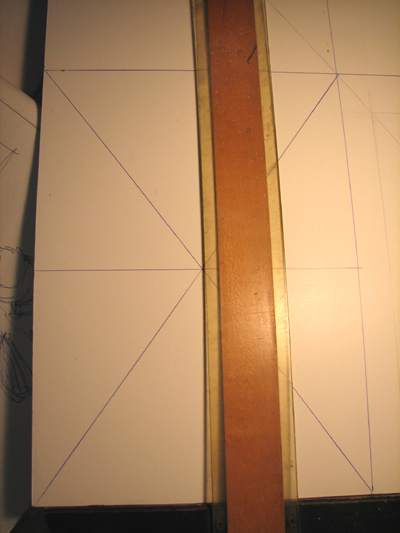
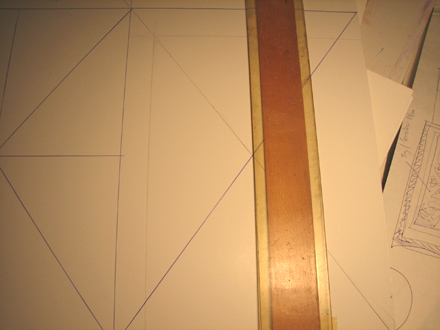
Here's the cool part: take your ruler (or even better a t-square)
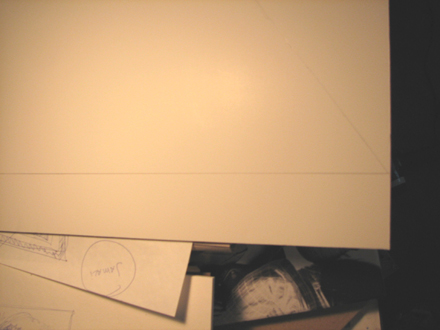
.. and draw a horizontal line from the edge of your paper right on over to the previously drawn diagonal line (I've darkened it up here a little):
Now, where this line intersects the diagonal line, align your ruler or t-square and draw a vertical line from the intersection on the diagonal line and draw it all the way down to the bottom edge of your paper like you'll see in the next three photos:
...Lining it up...
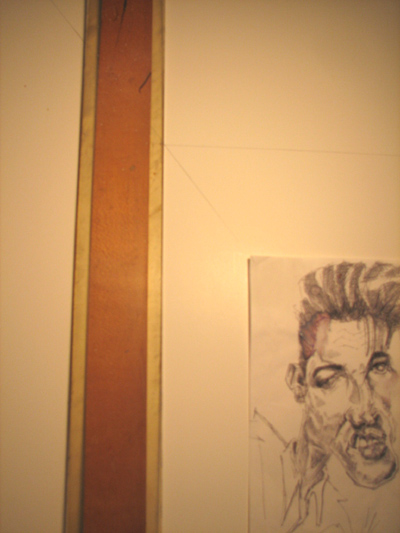
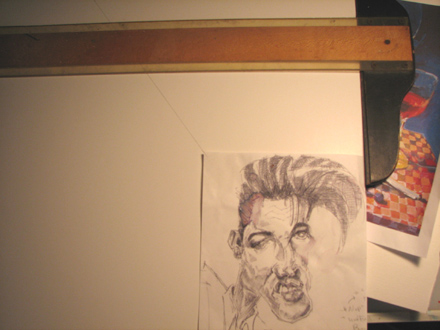
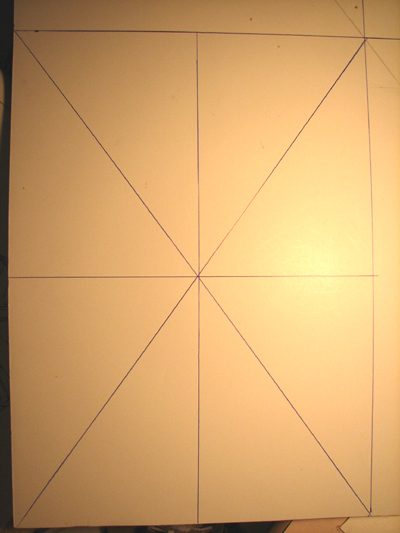
Now, in the next photo you can see these: the two lines I've just drawn, the original diagonal line, and the Elvis drawing:

It's proportionately perfect compared to the original piece of paper we're enlarging.
But what if you want to draw really big? Well you just draw out that diagonal line all the way and draw a horizontal and a vertical line off of it. Like this:

Above I've Photoshopped a black arrow to point out where the original diagonal line ran right off the paper (err, board). So guess what? No need to draw a horizontal line. Why not? Because the left edge of the board serves as the vertical line. You still need to draw the horizontal line however. I'm going to flip the board around a little to draw the horizontal line...
And below you can see the end result -- it looks like a crooked line but that's only because the paper gets distorted looking through the camera and the camera angle. The "just drawn horizontal line" is actually parallel to the the edge of the board (the papers's actually upside down right now too):
OK. So you've drawn up your paper and the proportion is intact but you're still looking at an awful lot of paper real estate. How do you keep perfect proportion or near perfect proportion when you're getting this large? Sure you could use a projector or you could go to Office Max and use their giant architectural enlarger copier. But heck no, we want to do it the hard way :-) But this way forces you to really exercise your drawing muscles. You're up to the task! And it's fun too :-)
Watch closely now...
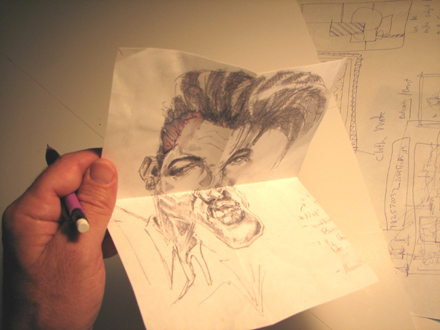
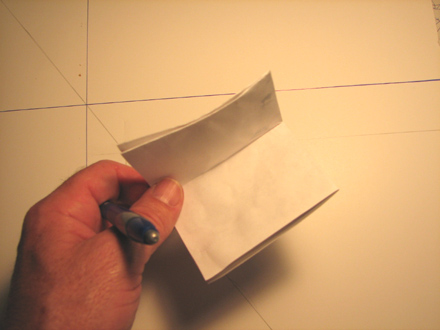
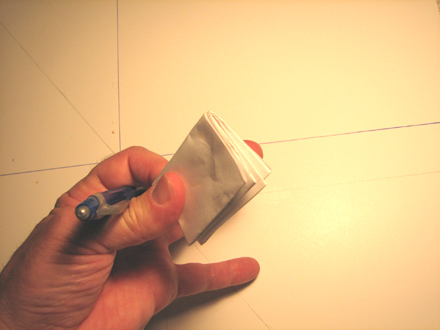
Yep, I'm folding Elvis in half....and in half again:
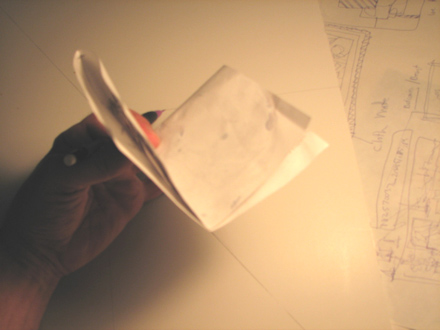
See how perfectly divided the paper is when you do a good job of folding? Check it out:
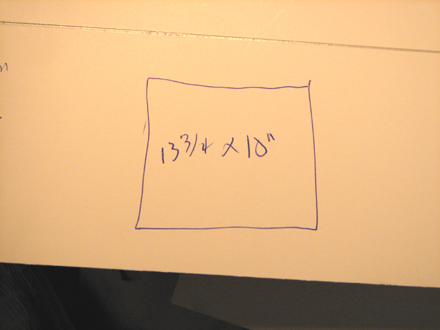
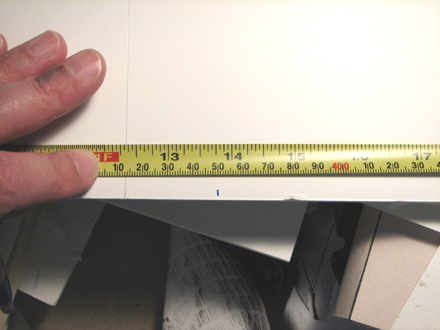
Now the one time you need a ruler is when you're working big. So I get out the handy tape measure and just measure the big penciled in square:
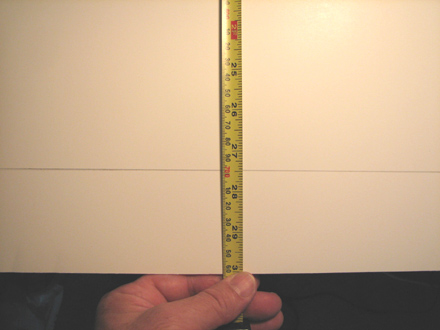
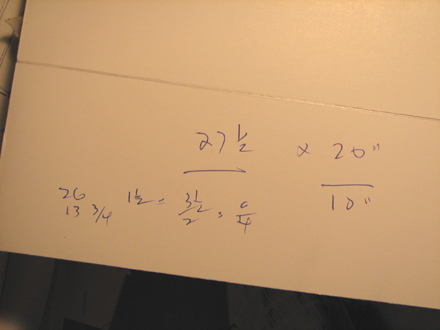
...27 and 1/2 inches tall by....
...by....
...exactly 20 inches wide. Not huge but good sized. Divide both those quantities in half and I get 13 and 3/4 inches by 10 inches. That's the distance to half way in both length and width...
...here's my math:
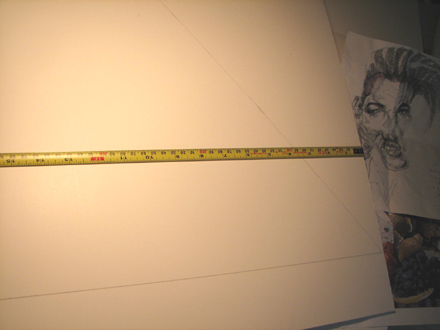
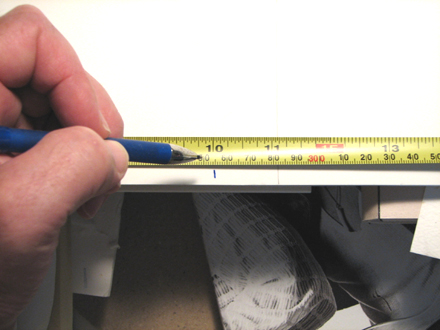
Now just measure it out on the paper...13 and 3/4:
...and 10":
...Draw them in and here's what you get: a rectangle exactly proportionate to the original picture divided in half both vertically and horizontally:
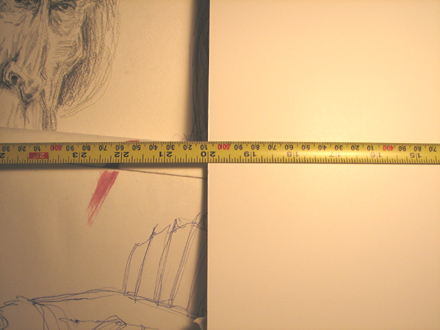
Now guess what? We're going to fold the paper in half again:
...and again:
Check out all those squares on Elvis:
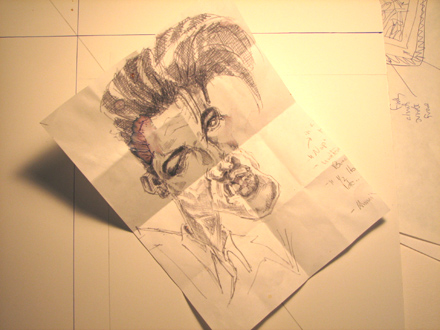
Looks just like he's saying "I'm all shook up". OK, bad joke :-)
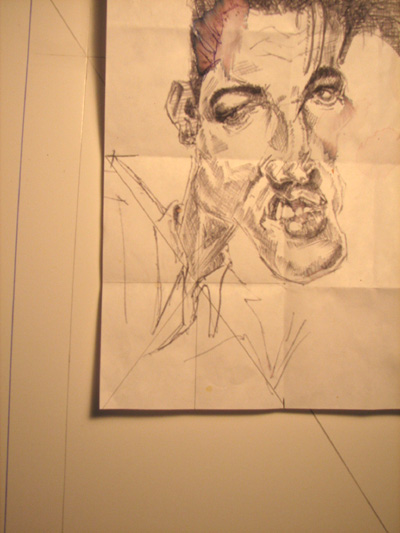
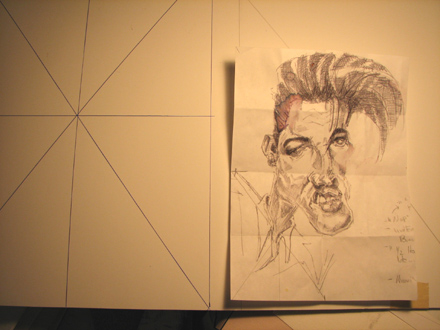
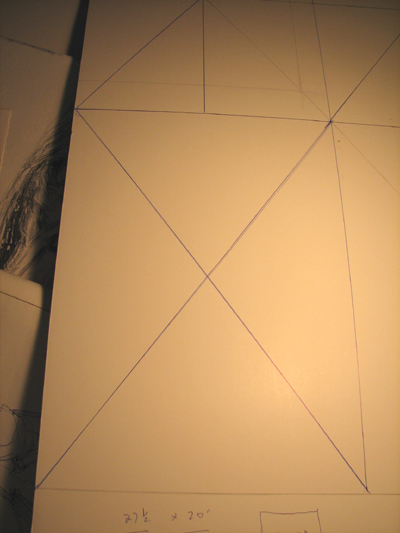
Here's a close up of the folded up Elvis - and note how it's aligned right over the diagonal line we originally drew:
In the next picture below I'm going to pencil in a square right along paper folds - it'll actually be the lower quarter of the picture
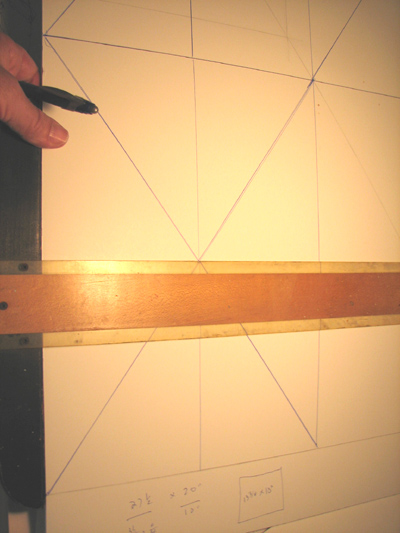
..below I'm using a ruler to line in another diagonal line:
See a pattern beginning to develop? Find a rectangle, draw in a diagonal...
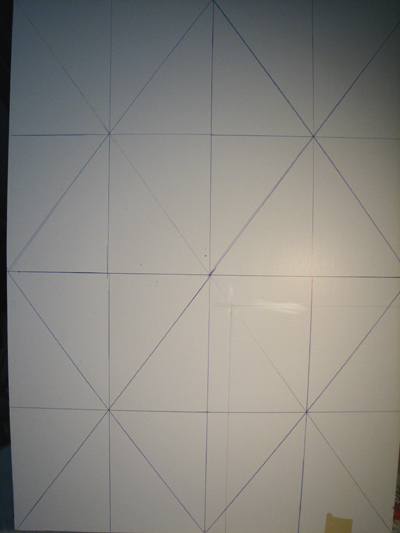
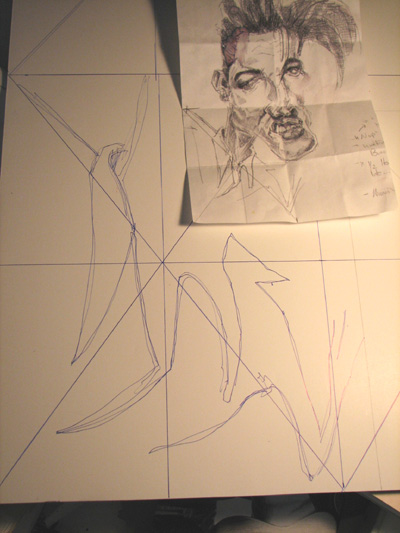
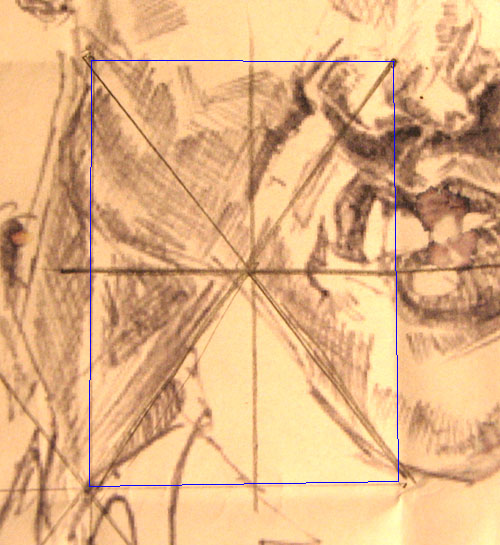
In this next picture I've drawn diagonal lines on the board. In fact I've drawn in two diagonals in the boards lower left quarter:
...and the neat thing about drawing two diagonals is they intersect pretty much right in the center of the rectangle...
...which makes it very easy to "t-square" vertical and horizontal halves. Which, in effect makes four more squares (or rectangles in this case) out of the lower left quarter of the board. Cool. So how the heck does that help us?
Well, look at Elvis again below. When we folded him in half a second time the fold lines in the paper pretty much made four more squares exactly proportionate to the four squares we drew on the board. What does that accomplish? Well all these proportionate and matching lines make grid marks we can translate from Elvis to the board - the grids are proportionately exact on both the small drawing and the big board. And with all those reference lines to refer to, contrast and compare, we can blow up Elvis relatively easily and accurately without even thinking about it.:
Now lets draw diagonals in the other three quarters on the board. And after drawing diagonals, draw the horizontal and vertical lines through the center of each rectangle (using of course the intersection of the diagonal lines as the point through which we draw the those vertical and horizontal lines). Kapiche?
Drawing diagonal #1 in the next quarter:
...after completing two diagonals, and horizontal and vertical line:
....flipping the board over and doing the same on the other quarters:
...drawing the vertical and horizontal lines again:
...and now the last quarter:
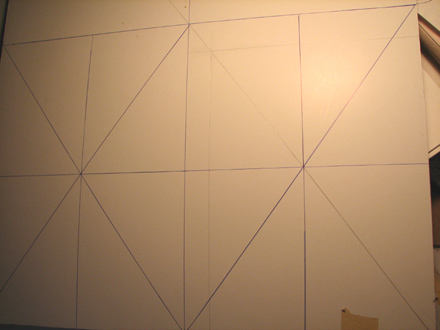
OK! Got all four quarters divided up. Now each separate rectangle is a miniature but completely proportionate replica of the larger rectangle we started with. It looks like this:
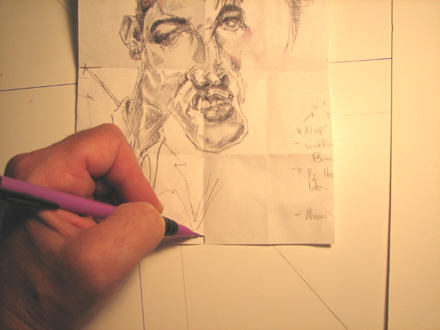
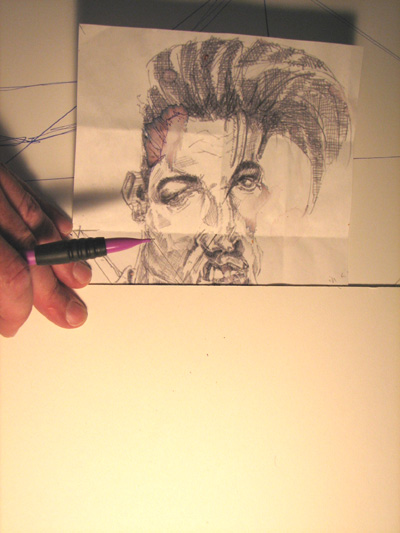
Back to Elvis. Lets draw lines to duplicate the lines we've drawn on the board above: draw the two diagonals within one of those quadrants, draw a horizontal and vertical line that pass directly through the center where the two diagonals meet:
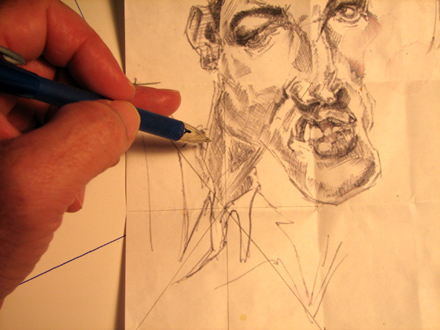
Now we have a grid drawn on both Elvis and the larger board. It's time to start transferring. Where to start? Always easiest to begin where you have strong lines intersecting a grid line. I began with the collar and shoulders - they parallel strongly the diagonal line plus the neck lines up pretty close to the intersection of the two main diagonals. Compare this on both the folded paper Elvis and what's been drawn on the larger board. Do you see the neck and shirt collar (being drawn)?
...I'm going for the main lines here: the shirt collar that drops below and to the left of the diagonal that starts high on the left and drops low to the right; the elbow almost drops to the very bottom of the paper - look where it and the arm cross the center vertical line. See how we're using relationships once again? "Relationships" meaning e.g. "how does this line or edge compare to horizontal and vertical? to the diagonal? Does this line or edge form a shape?" If you look at the shape by the negative space it forms does it get any easier to draw? If any of this "negative shape", "line" or "edge" talk sounds foreign click on the links below to get refreshed!
The five skills of drawing - no password needed here
Lines and edges - scroll down this page until you read "The First Skill of Drawing"
Negative spaces - large Flash lesson
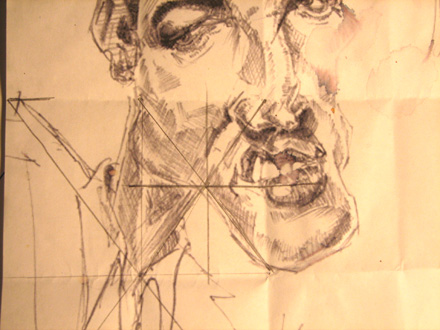
OK. Now we're working into an area with a whole bunch of detail. Is there an easier way of doing hat? Sure! It's great practice to use as few grid lines as possible but it's also a good exercise to use more grid lines to build a different muscle in your brain. You'll know what I mean by that if you try to duplicate this entire exercise I'm doing here.
Click to print out Elvis: here's the page again
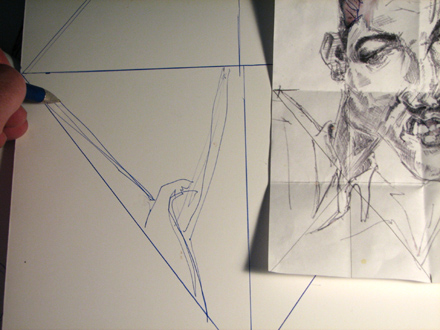
So what I'm doing in this next picture is penciling in a still smaller square (one that was made by folding of course) and doing the same on the bigger drawing board. You've already seen it done above - we're just doing it again (what are we doing? Drawing two diagonals through an already formed rectangle then dividing it up yet again with horizontal and vertical lines:
You have to look close because the pencil lines don't show up so well but I'm doing the same old pattern we did above. You can see it forming below:
I've roughly squared it off below so you can see the same old grid pattern:
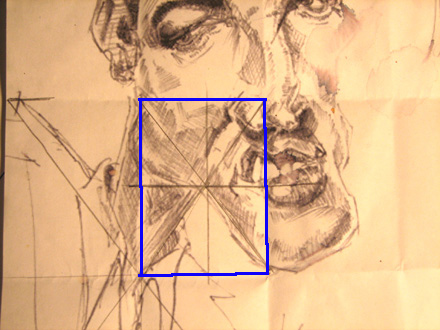
Now move your eye around within this square: see the different relations? Look at how the collar and the jaw and the shadow shapes all form angles relative to the vertical, horizontal and diagonals. All you have to do is duplicate those relations on the larger board. and voila! You have your enlargement. Just for fun, here's a close up:
Squint your eyes until you can see the shadows and highlights as separate shapes, until the angles formed between vertical and horizontal are clear, see those shapes and spaces!
See this Flash lesson again to make this clear your yourself.
I've given you more than enough to chew on. Next issue, we'll finish off a bunch more on this drawing. By the end of that issue you'll really know how to do your own enlargements. OK! Off we go.
So really give this a whirl! Get some 17 x 24 inch paper and enlarge a smaller picture into it using the technique you've seen on this page. Dive in and don't be afraid!
Warmly,
Jeff
--------------------------------------------------------------------------------
Kasbohm & Company's
Drawing-Faces-and-Caricatures-Made-Easy.com
and
YouCanDraw.com
© Copyright, All rights reserved 1997-2007
|